

Contents
Each release there are changes to the MAS user interface or navigation, and MAS 9.2 is no exception. Most of these are because of an IBM Idea that was raised and voted on by users.
Adding a Logout Icon to the Masthead

In Maximo 7.6.1.3 there was a Logout Icon in the Masthead that was positioned between the Profile and Help icons. This disappeared sometime during the MAS releases with it being found at the bottom of the Profile menu. In MAS 9.2 there is a System Property mas.ui.header.showLogoutIcon that will add it back to the masthead, it will remove it from the profile menu. The default for the System Property is false, and you need to set it to true, save, select it, and then perform a Live Refresh. You have to logout/login before it takes effect.
Setting your own Default Application

When you login to MAS for many users, including myself, the landing page is the Suite Navigator. In MAS 9.2 each user can set their own landing page. Go to Profile in the Masthead and Default Information, and select an application for the Default Application field, I’ve selected the Operational Dashboard, OPDASHBOARD.
Note. If you leave your tab open and logout/login Maximo goes to your Default Application. If you close your tab, open a new tab and use your bookmark, then it arrives back at the Suite Navigator but after selecting Manage you will be directed to your Default Application. If you want to avoid the MAS Navigator entirely then set your bookmark to show /maximo after the domain name for MAS.
Administrators can set up a Default Application for a Security Group in either Security Groups (Manage) or the Security Groups application which is part of the Access and Usage module at the Suite level. In the MAXDEMO database the STOREROOMCLERK Security Group is defined with INVENTOR – Inventory as the Default Application.
Removing the Role Based Menus

In MAS 9.1 there were quite a few places across the Navigation Bar where you found an extra menu called “Role Based Applications”. For example, in the Self Service module there was one containing a menu item called Service Requests and you needed to click on this to find two applications Service Requests and Create Service Requests. In MAS 9.2 the two applications have been added to the module menu, saving two clicks, and if they are part of Maximo Mobile, which many of them are, then they now have a suffix of (Mobile).
As you can see the Role Based Application hasn’t disappeared everywhere. It still exists for Incident Reporter and Permit to Work which you will see if you have HSE installed. I’ve raised an IBM Support Desk case for this.
You will also find that in some places the extra menu item has been removed and the applications exist at the module level, as for the two applications Service Requests (Mobile) and Create Service Requests (Mobile), but in other places you will find an extra menu item as in Asset Manager and LocationA physical place where assets exist and where work can be performed. More Manager, both part of the Assets module.
The advantage of adding the suffix (Mobile) to the mobile applications is that you can easily search for them by using the Filter Navigation at the top of the Navigation Bar.
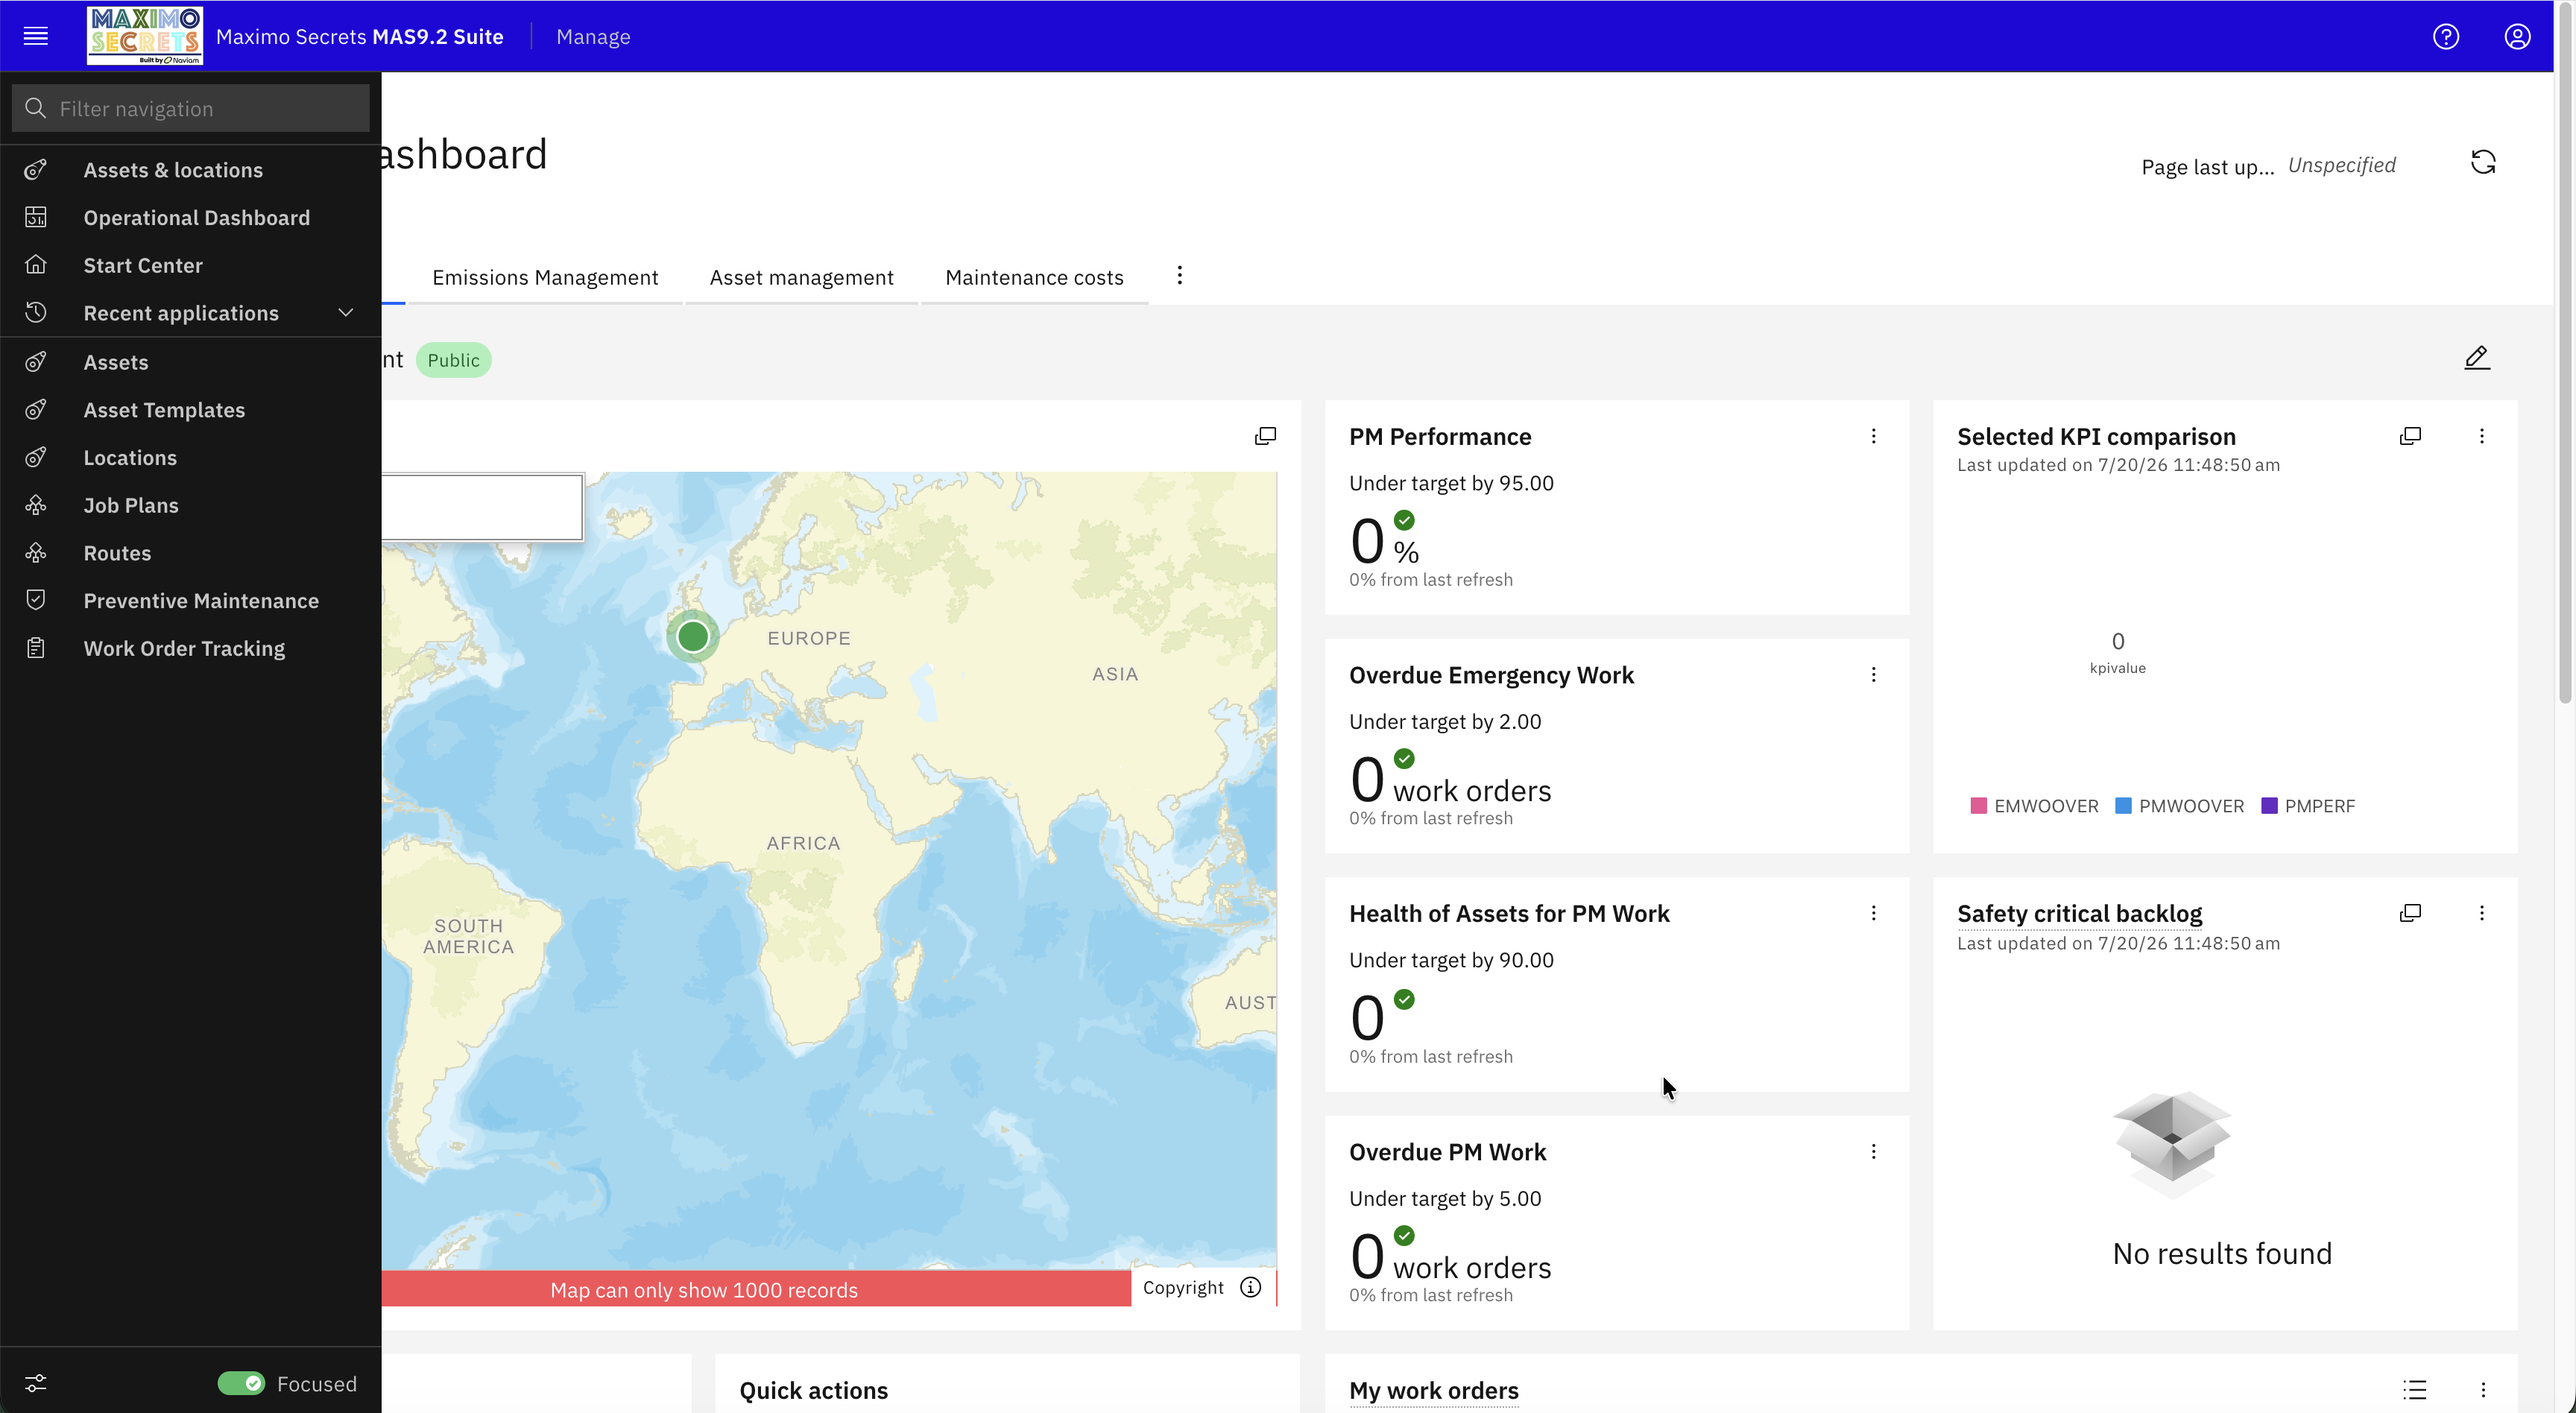
Focused Navigation

The Navigation Bar has a Focused toggle at the bottom. It is sticky, so it will always be visible if you are vertically scrolling in the Navigation Bar, the same as Asset & Locations, Operational Dashboard, Start Center, and Recent Applications are always visible, but at the top of the Navigation Bar. When it is inactive it is showing the full hierarchy of applications, when active the focused applications.
The button to the left will open the Focused Navigation Settings dialog.

The Focused Navigation Settings dialog allows a user to set up the applications they wish to see when they toggle to the Focused view. Notice Recent Applications is selected and it can be removed from the right-hand panel.

I’ve selected the applications Assets, Asset Templates, Locations, Job Plans, Routes, Preventive Maintenance and Work Order Tracking and will now use the blue Save button.
The order in which you add the applications to Your Focused Navigation (right-hand panel) will be the order displayed, but using the button on the left of the panel you can drag an application to change this order.

A couple of seconds after Save, the Focused Navigation Menu shows the applications you chose. Incidentally, I did test the removal of the Recent Applications, it works OK.
The data is stored per user in the object FOCUSEDNAV. The focused applications (FOCUSEDAPPS) are stored as one long string up to 4000 characters.
There is a System Property which I also tested – mas.ui.header.hideFocusMode. It has a default of 0 which means it is visible. You can remove the Focused Navigation panel from the footer of the Navigation Bar by setting it to 1, save, selecting it, and then performing a Live Refresh. You have to logout/login before it takes effect.
Display/Hide Side Action Menu

In MAS 9.1 you could hide/unhide the Side Action Menu using the button at the top of the application, (>) hidden, (<) unhidden. You couldn’t set this either as a default for the whole system or as a user.

In MAS 9.2 in a user’s Profile – Default Information, there is a new radio button called Side Action Menu with options for Display or Hidden. When set to Hide, an application opens with the Side Action Menu hidden, but it can always be displayed by using the (>) button. When set to Display, the application opens as it did in previous versions with the Side Action Menu displayed, but it can be hidden by using the (<) button.
You can set it to be hidden for all users with the System Property – mxe.webclient.systemNavBar – which, when set to 0 will hide the Side Action Menu. When set to 1 (the default), the Side Action Menu will be displayed for all users except those whose individual profile shows that it is to be hidden. The field is MAXUSER.SIDENAV it is an Integer field, not a YORN field.
List Page Filter is now Docked

In MAS 9.2 the List tab of an application now has a docked table filter row. Typically, 15 of 20 rows will be displayed and there will be a vertical scrollbar to the right.

When you scroll vertically down, the table filter row will remain in view, it is docked.
Positioning of System Messages – Save

When a record is saved the green message previously obscured some of the application buttons and you needed to wait for the message to disappear before you could use the buttons. I can’t say that I have noticed this before, but it is one of the User Interface delivered ideas for MAS 9.2 – https://ideas.ibm.com/ideas/MASM-I-1272

This MAS system is at Maximo Manage Operator Version 9.1.19 and if you compare with the previous screenshot you can see the information message is displayed in the same place as for MAS 9.2. You might find an improvement depending on your current version.
Incidentally, the Maximo Manage Operator Version is displayed in the System Information, it started appearing more than a year ago.
Text Box Drag and Drop

Drag and Drop used to work in Maximo 7.6 instead of using cut, copy and paste. A new feature of MAS 9.2 allows you to drag text between text boxes. I have created an Inventory Usage record, filled the first record and saved. I’ve created three additional records.

Highlighting item 6I-2500 on line 1 you can drag it to line 2, then line 3 and to line 4. It does momentarily look as if it has removed it from the previous line, but then the value is repopulated on the previous line.
To be honest, on my Mac I am so used to using Command-C (Copy), Command-V (Paste) and Command-X (Cut) which works well in Maximo, that I doubt I will use this feature.